


AMAJUBA EXPERIENCE – BATTLEFIELDS TOURS
In conjunction with THE NATAL FIELD FORCE
‘‘Our desire is to find you a great getaway adventure on the northwest frontier of the Zulu kingdom’’.
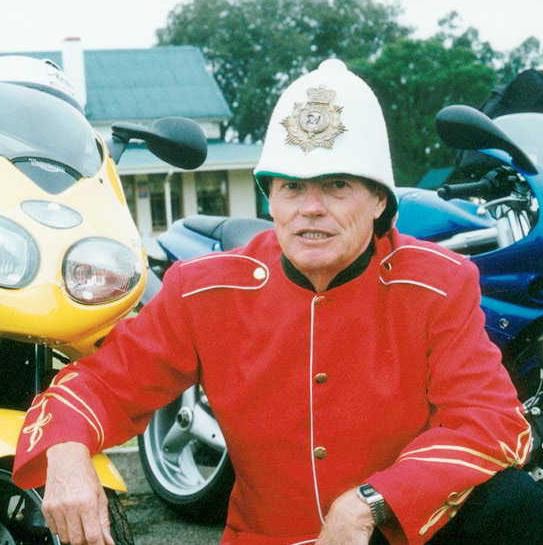
Dave Sutcliffe, known as the ‘Redcoat’, is a registered Guide for the Battlefields of KwaZulu-Natal and a Member of the Battlefields Region Guides of KwaZulu-Natal Having lived in the area for some 35 years, 15 of which have been spent conducting tours of the more notable Battlefields of the Boer – Zulu conflict, the Anglo Zulu War, the Transvaal War of Independence and the Anglo Boer War, Dave is now able to assist you organise you tour.
Although now based in the United Kingdom, where he conducts talks on the many wars and Battles of KwaZulu-Natal, he also promotes the The Battlefields Region and KwaZulu-Natal and will assist you in arranging your tour of the Battlefields Region and the Province in general using the assistance of his many colleagues and contacts in the Region.
All tours are arranged with only the most experienced and registered Guides and can be custom made to suite the client’s requirements. Tours can be arranged to collect you from the airport or from your hotel in the area, if you are self driving. The minimum duration, however, is a full day.
So why not let us help you organise your trip to this fascinating part of the world so that you can stand in that Laager of Wagons at Blood River and listen to the story of one of the most remarkable battles in history, or follow in the footsteps of Lord Chelmsford’s fateful Central Column as it invades Zululand and makes its way to Isandlwana and its date with destiny, then fall back to Rorke’s Drift, stoically defended by the men of B Company, 2nd Battalion, 24th Regt against overwhelming odds, both famous battles of the Anglo-Zulu War. Next travel to Ladysmith, besieged for 118 day and visit the fascinating Siege Museum as well as many of the Battles to relieve Ladysmith including that “acre of massacre” at Spion Kop.
ADVICE
Visiting Battlefields at random can be very confusing unless you are very familiar with the history and it is far better to choose the conflict first and then the battles from that conflict or war.
“Choose your battle or choose your war and let the Recoat organise your visit “.
SAMPLE ITINERARIES
On the following pages you will find sample tours that can be taken from Newcastle, Dundee and Ladysmith. These do not have to be strictly adhered to, but they do give you a very good idea of what can be done.
THE ZULU – BOER CONFLICT 1838
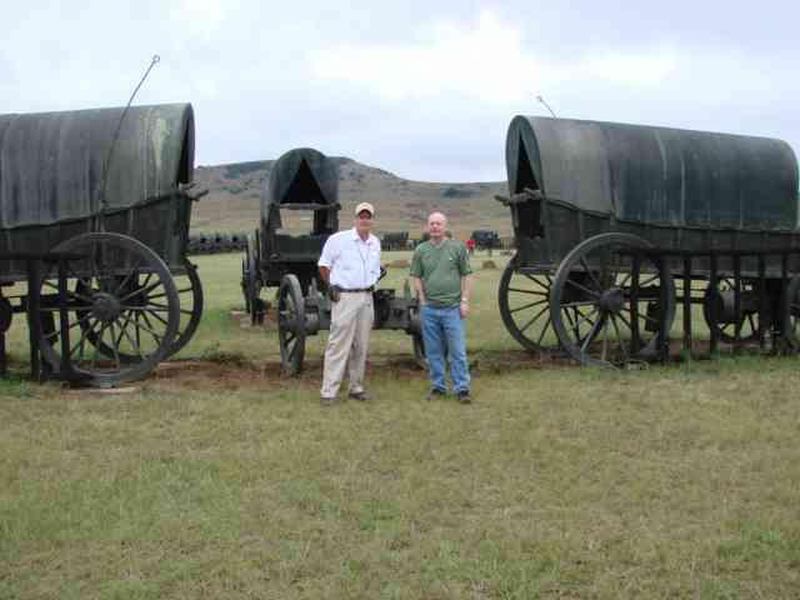
Visit Blood River, the most pivotal, and fascinating battle in South African History. Stand in the laager of 64 full sized bronzed wagons and listen to the Guide relate the incredible events of the night before the battle, of the 464 armed men, behind their wagons, surrounded by some 12 000 Zulu Warriors, just waiting for the sun to rise. Hear about the tremendous 6 hour battle and its incredible outcome and wonder if you have just heard a story from the Old Testament.
You visit the Orientation Centre at Blood River and then cross over the river and visit the Zulu Cultural Musem at Ncome. Then have lunch at the restaurant at Blood River or return to Dundee and the fascinating, multifaceted museum at Talana www.talana.co.za
ANGLO-ZULU WAR OF 1879 ISANDLWANA AND RORKE’S DRIFT:
Follow the trail of Lord Chelmsford’s ill-fated, Central Column as they cross the Umzinyathi River at Rorke’s Drift and invade Zululand.
See the hills where they skirmished with Sihayo’s warriors before finally making camp on 20th January. Follow the events that lead to the Zulu attack on the 22nd January and the massacre of some 1400 Imperial troops and Native levies on that fateful day. Let us show you the fearful trail taken by the fugitives in their desperate flight back to Natal.
Visit the Mission station at Rorke’s Drift defended so heroically by the men of “B” company 2/24th Regiment as they fought a desperate 12-hour battle against fearful odds earning 11 Victoria Crosses in the process.
This tour takes one day, a guide, visits to the drift at Rorke’s Drift, the orientation centre and battlefield at Isandlwana, the museum and battlefield at Rorke’s Drift, Lunch can arranged at the Rorke’s Drift Hotel on the banks of the Buffalo River.
THE TRANSVAAL WAR OF INDEPENDENCE 1880 – 1881
LAING’S NEK, SCHUINSHOOGTE AND MAJUBA:
Follow the trail of Gen. Sir George Pomeroy-Colley and his Natal Field Force as they try to break through the defensive line of Comdt. General Piet Joubert’s Burghers and enter the Transvaal.
Visit the museum at Fort Amiel, which was the commissariat and starting point of Gen. Colley’s expedition.
View the Battleground at Laing’s Nek, where Joubert’s Burghers repulsed Colley’s line regiments for the first time forcing them to retreat to Mt. Prospect.
Stroll over the Battlefield of Schuinshoogte where the Burghers of Nicholas Smit forced Colley’s ‘show of force’ to retreat back to Mt. Prospect.
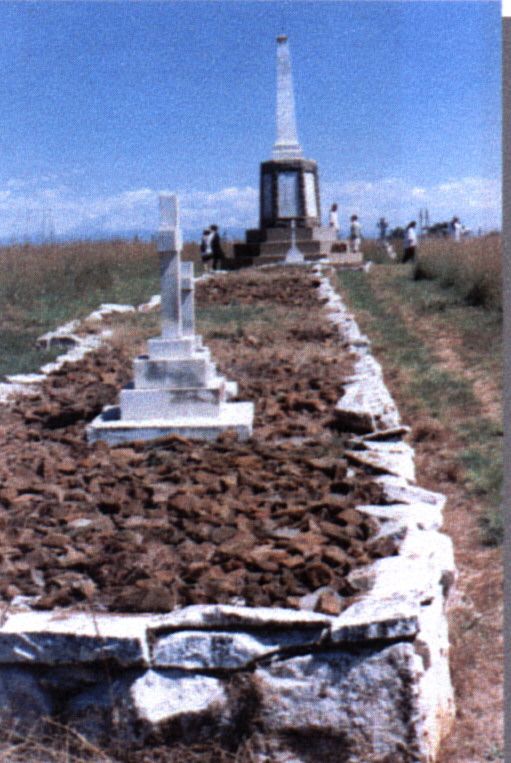
Climb the legendary Majuba, where Cmdt. Gen. Piet Joubert’s Burghers inflicted, on Colley, one of the most humiliating defeats the British Army ever suffered when they forced the British off their ‘impregnable position’ on top of the mountain causing some 258 casualties to their own six.
This tour takes a day and includes a briefing on the battlefield, a guide, and visits to Fort Amiel Museum, which is a typical frontier fort, the Battlefields of Schuinshoogte, Laing’s Nek, and Majuba. Time permitting, visits will also be made to O’Neil’s Cottage, where the truce was signed, and the British Cemetery at Mt. Prospect.
ANGLO-BOER WAR 1899-1902 LADYSMITH, PLATRAND, SPION KOP, COLENSO, CHURCHILL CAPTURE:
Follow the events that lead to the Siege of Ladysmith, get a first hand look at what it was like besieged in this “little, dusty town” that managed to keep the Boer Forces at bay for one hundred and eighteen days to become “famous to the uttermost ends of the earth”.
Visit the Platrand where on the 6th January 1900 the desperate Battles of Caesar’s Camp and Wagon Hill were fought. Or perhaps you may prefer to visit that “bloody acre” on top of Spion Kop where one of the most fruitless and bloody battles of the war was fought on 23-24th January 1900. There is also an option of going down to Colenso or on to the Churchill Capture site and returning via the Tugela Heights, where Boer and British fought it out over 14 days before the British finally broke through to relieve Ladysmith on 28th February 1900.
Listen to the tales of courage and fortitude by the men of both sides and visit the numerous monuments to those who fell in these desperate struggles.
To visit all these sites takes more than a day, so one has to be selective taking Ladysmith and Spion Kop, or Ladysmith and Platrand, or Ladysmith, Colenso and the Churchill Capture site. Some variations on this arrangement can also be accommodated depending on timing.
The tour includes, a guide, visits to the Siege Museum in Ladysmith and a selection of other sites, including the Anglican Church in Ladysmith, Platrand, Spion Kop, Colenso, the Churchill capture site and the Tugela Heights.